You can print each transaction form that you have created using the default design template available at LEVERAGE. You can adjust the default LEVERAGE template according to your needs. In addition to providing ready-made default templates, LEVERAGE also provides a feature that you can use to create new form template designs according to what you want. The feature in question is the Form Template. With the Form Template feature, you can change the default template that is already available or you can even replace the default template with a design template that you make yourself. TEMPLATE TYPE Template type available at LEVERAGE consists of: 1. Sales Invoice, which is the type of template used to print the Sales Invoice form 2. Sales Order, which is the type of template used to print the Sales Order form 3. Delivery Order, which is the type of template used to print the Goods Delivery form 4. Sales Return, namely the type of template used to print the Sales Return form 5. Purchase Invoice, which is the type of template used to print the Purchase Invoice form 6. Receive Items, namely the type of template used to print the Goods Receipt form 7. Purchase Order, namely the type of template used to print the Purchase Order form 8. Purchase Return, namely the type of template used to print the Purchase Return form 9. Item Transfer, namely the type of template used to print the goods transfer form 10. Local VAT Invoice, namely the type of template used to print the Standard Tax Invoice form (PKR Currency) 11. Purchase Payment, namely the type of template used to print the Purchase Payment form. 12. Sales Receipt, namely the type of template used to print Sales Receipt forms. 13. Job Costing, namely the type of template used to print the Order Financing form. 14. Inventory Adjustment, namely the type of template used to print the Inventory Adjustment form 15. Journal Voucher, namely the type of template used to print the Journal Evidence form 16. Other Deposit, namely the type of template used to print the Other Receipt form 17. Other Payment, namely the type of template used to print the Other Payment form 18. VAT Invoice Foreign, namely the type of template used to print the Standard Tax Invoice (Foreign Currency) form 19. Return Note, namely the type of template used to print Sales Return forms 20. Sales Quotation, which is the type of template used to print the Sales Quotation form. 21. Purchase Requisition, namely the type of template used to print the Purchase Request form. 22. RMA, namely the type of template used to print the RMA form 23. Serial Number Entries, namely the type of template used to print Serial Number Entries forms. 24. Withholding Taxes, which is the type of template used to print the Income Tax Withholding Evidence form CHANGE DEFAULT TEMPLATE LEVERAGE You can change the default LEVERAGE template according to your needs by following the instructions below: 1. Open the Form Template from the main menu Setup – Form Template 2. To make it easier for you to understand how to change the default template design that is already available, the following image presents an example of editing the Sales Invoice template design: 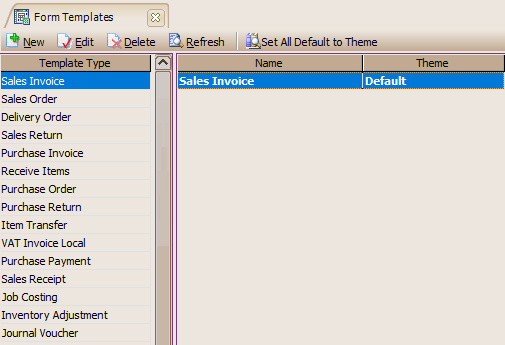
1. Click the template type, then double click the name of the template you want to edit or changed to open the Form Template Field Selection 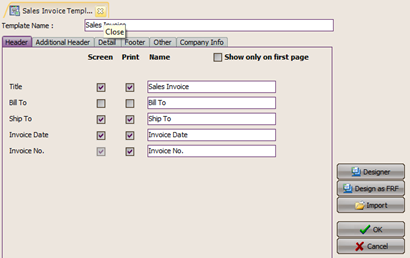
2. On the Header Tab to the Other Tab, you can change the information that has been available with the name you want. Example: If you want your form title to be Sales Invoice, then you can change the name of Title (Sales ) to Sales Invoice. 3. Apart from changing the name on the Header Tab to the Other Tab, you can also set what information will be displayed on the screen and print the form. Look at the following picture: 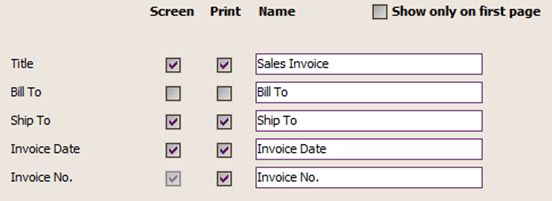
Check this option, if detailed information on Tab The header just wants you display on the page first Transaction Form You can check the Print check box on any detailed information, if such detailed information you want to display in the Form view to be printed or printed. You can check the Screen on check box any detailed information, if such detailed information you want to display in the Forms view on the screen monitor only but not on the printout display form. If you want all of these detailed information to be displayed on the transaction form either on the monitor screen or when the form is printed, then you can check the Screen check box and the Print check box at the same time. 4. After setting the detailed information that you will display on the LEVERAGE Transaction Form, then you can arrange the order of the columns in the table details of the Form, for more details, pay attention to the instructions in the following image: 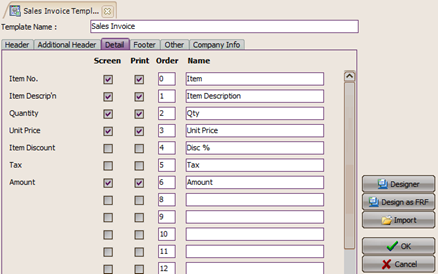
1. Click the Details Tab for settings the order of the columns in the Form Table Details 2. Fill in the order number in the Order box. Instructions for filling in the order number: The number 0 indicates the position of the first column in the Form Table Details, followed by Numbers 1 and so on according to column order You want. Example : If you want to display Column Item as the first Column in the Table of contents Transaction Form, then you can fill out Order Item box with Number 0. 5. You can also display your Company Logo on the Transaction Form, for more details, see the instructions in the following image: 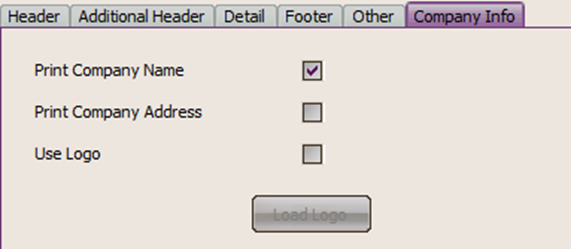
1. Tick check box Use Logo then click the Load Logo Button 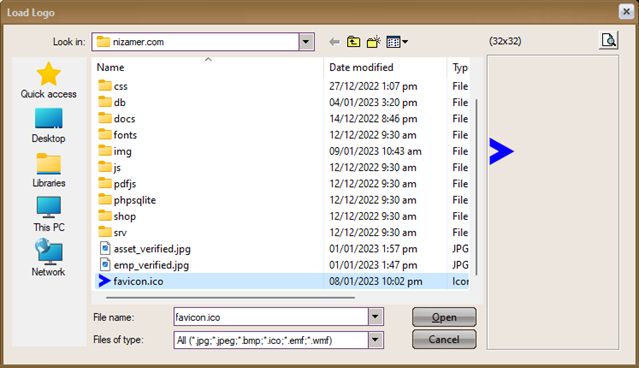
2. Click the Logo to be uploaded Then click OPEN button 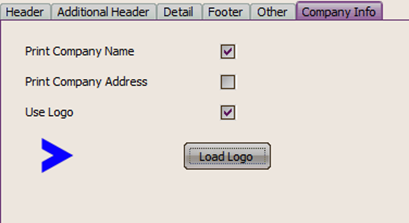
The company logo works on uploads. You can adjust Logo position in the Design view Form by clicking designer button 6. You can make further settings in the Form Designer view by using the tools available in the Transaction Form Template Designer form. 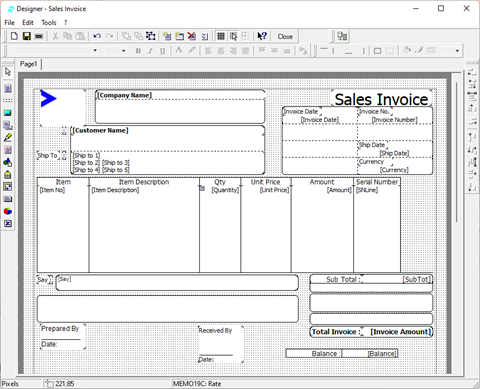
Change Design Templates by using Available tools 7. Click the Save button to save the edits that you have made then click the Close button. CREATE A NEW TEMPLATE You can create a new Form Design (Template) apart from the already available Default Template by following these instructions: 1. Open the Form Template from the main menu Setup – Form Template. 2. Click the New button located on the Form Template then select Template. To make it easier for you to understand how to create a new template name, pay attention to the instructions in the following figure: 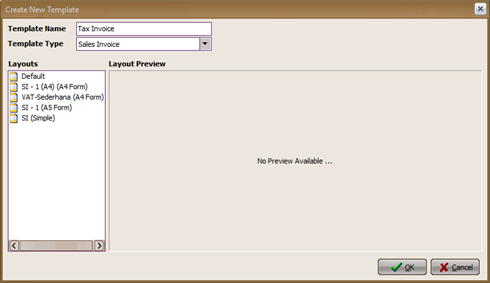
3. Continue setting up your new template design by following the same instructions as the instructions on how to change the default template previously described. 4. After you have finished creating the new template, the next step is to set the new template as the default template, which is the template that will be used as the default every time you print a Transaction Form. Pay attention to the following picture: 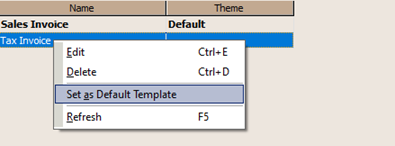
|