PROJECT MODULE 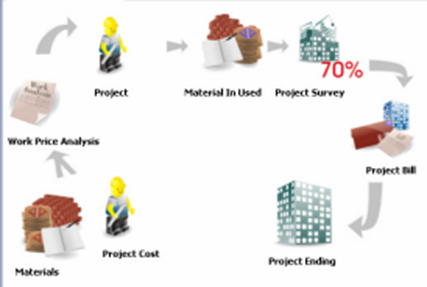
The Project module is one of the newest features available in LEVERAGE Accounting Software Ver.4. The Project module consists of forms such as Standard Material Forms, Project Standard Cost Forms, Work Price Analysis Forms, Project Forms, Material In Used Forms, Project Survey Forms, Project Bill Forms and Ending Forms. The forms contained in the project module function to make it easier for users to record accounting for ongoing project activities. The activities in the project module can be opened by: Click the Activities – Project main menu. PREPARATION – PREPARATION TO BE MADE So that you can record project activities easily, you should first make the following preparations in your LEVERAGE database: a. MANAGE ACCOUNT DEFAULT PROJECT (PROJECT DEFAULT ACCOUNT) The default project account setting is required so that LEVERAGE can record/journalize project activities to the right account so that LEVERAGE can present proper and LEVERAGE financial information. You can guide the LEVERAGE user (customer) to set the default project account by following these instructions: 1. Setting the default project account can be done via the Preferences form, so when you ask a customer to click on the main menu Setup – Preferences – Cost & Profit Center – Multi Project. 2. Setting the default account for project cost by following these instructions: DEFAULT ACCOUNT FOR PROJECT COST 
Default Account For Project Cost is the default account that functions to record labor and overhead used in project activities. LEVERAGE will automatically record (journalize) the Labor and Overhead used in project work when you create the Material In Used Form [Labor & Overhead Tab]. This default account is almost the same as the default account item. The Default Account for Project Cost that you fill in in this Preference form will be used as the default Account every time you create a new Project Cost in the Project Cost List. It's the same with Item Default Account, you can adjust the Default Account for Project Cost with the new project cost that you create. To make it easier to fill in the Default Account for Project Cost, the following is an explanation: Ø Expense Account: This Default Account serves to record costs for the use of labor and overhead in project activities. So in this field you can choose an account with Expense Type. Ø Prepaid Account: This Default Account serves to record debts / obligations arising from the use of labor and overhead in project activities. So in this field you can select an account with Type Other Current Liabilities. 3. Setting the default account for project cost by following these instructions: 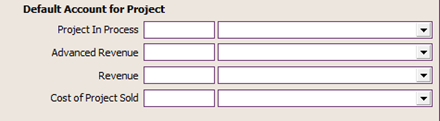
Ø You can fill in the Project In Process field with an Account of the Other Current Asset type. The default Project In Process account serves to record project work in progress, where the value of this account is the accumulation of the material values used in the project plus the value of labor and overhead used in the project. LEVERAGE will automatically debit this account when you create the Material In Used Form. Ø You can fill in the Advanced Revenue field with other current liabilities type accounts. The Advanced Revenue default account serves to record project DP billing to customers. This account is automatically credited when you create a Sales Invoice Form to record project DP bills to customers. Ø You can fill in the Revenue Field with a revenue type Account. The default Revenue account serves to record Project billing to Customers. This account is automatically credited when you create a Sales Invoice Form to record Project billing to Customers. Ø You can fill in the Cost Of Good Sold field with a cost of good sold account type. The default Cost Of Good Sold account serves to record the cost of the Project. This account is automatically debited when you create a Sales Invoice Form to record Project billing to Customers. MAKE A PROJECT COST LIST [LIST OF PROJECT COST] List of Project Costs [List Of Project Cost] is a table that displays a list of labor costs and overhead costs used in Project Activities. How to Make a Project Cost List: 1. Click the main menu List – Projects – Project Cost, then click the New button to display the New Project Cost entry form. 2. Fill in the New Project Cost form by following the instructions below: a. Project Cost No : In this field, type the serial number of the project costs b. Description : In this field type a description of the cost of the project c. Cost Unit : In this field type the unit of project cost. Typing the cost of this project is a maximum of 3 digits. Example: Carpenters unit cost: hr (days) d. Cost Type : In this field, select the type of project cost that you are creating. There are two choices of Direct Cost and Operational Cost. e. Expense Account : This field is automatically filled with default project cost account that has been previously set in the Setup Preference. You can replace this account according to the project cost that you made. f. Prepaid Account : This field is automatically filled with the default project cost account that has been previously set in the Setup Preference. You can replace this account according to the project cost that you made. 3. After you have completed all of the New Project Cost fields, the next step is to click the Next button to save the Project Cost that you have created while continuing to create the next project cost. 4. Here is a picture of an example of filling out the Project Cost Form: 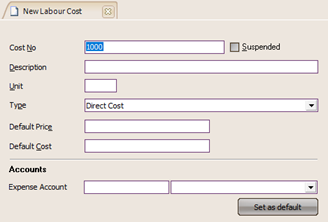
MAKE A LIST OF PROJECT MATERIALS You can enter raw materials that you will use in Project Activities in the List of Goods and Services. Enter the names of the raw materials that you will use in the Project Activity by following the instructions below: 1. Open the List of Goods and Services by clicking the List – Item main menu 2. In the List Of Item view, click the New button to open a new item form 3. Fill in the new item form according to the raw material information you have, by following the instructions below this : a. Tab General In this tab you can fill in general information about the raw materials you have. b. Tab GL Account On this tab you can set the default account that will be used to record these raw materials in transactions. 4. After you have input all the necessary information regarding these raw materials, the next step is to click the OK button to save the new raw material information that you have created. 5. The following is an example of inputting raw materials in the new item form: 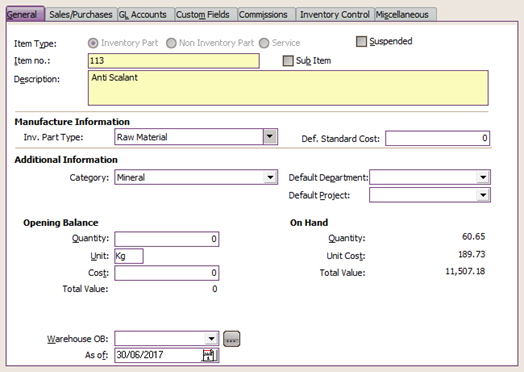
Charging information raw material on Tab General 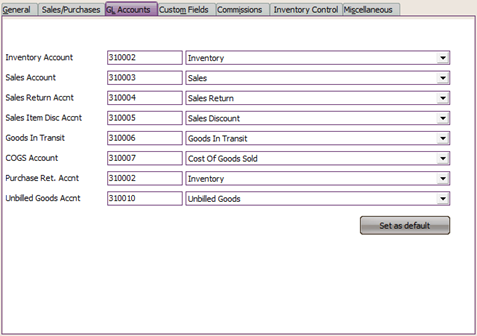
Delivery information raw material on the GL Tab Account MAKING PROJECT COST BUDGET AND PRICE ADJUSTMENT Standard project costs consist of standard labor costs and standard overhead costs. This project cost standard is needed in determining the project budget, where labor and overhead costs used in project activities will still be calculated based on the actual value of these costs. In addition to setting the standard cost of project costs, the Project Standard Cost form also functions to adjust the selling price (price) of project costs. Determining the selling price (price) of this project cost will later become one of the factors that affect the default selling price (default sales price) of the Project Activity that you are working on. Adjustments to standard project costs (budget cost and price) can be made through the New Project Cost Budget & Price Adj form by: 1. Click the Activities main menu – Project – Project Cost Budget & Price Adj 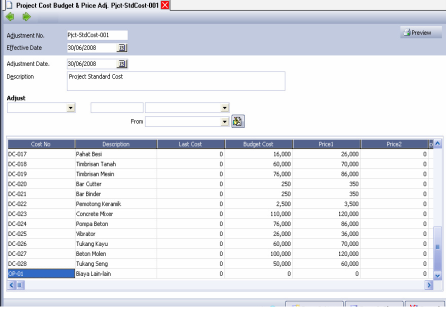
2. Fill in the New Project Cost Budget & Price Adj form according to the following instructions: a. Adjustment No : Fill this field with the serial number of the form. b. Effective Date : Fill in this field with the date the standard fee is effectively used in the transaction. c. Adjustment Date : Fill in this field with the date on which you made adjustments to the Project Cost Budget. d. Description : Fill in this field with a brief description of the New Project Cost Budget & Price Adj form that you created. e. Adjust : With this field you can easily specify which column details you want to adjust and the value of the adjustment you want. You can use this field if you have previously created a standard project cost adjustment form. f. From : Select the price column details that you will use as a basis for adjusting project costs. g. Detail Table New Project Cost Budget : Details of the New Project Cost Budget table consisting of the following columns: Ø Cost No : If you have previously made a list of Project Costs, this column will automatically display the project cost number that you have. Ø Description : Type a brief description of the New Project Cost Budget & Price Adj Last Cost form that you have created. Ø Budget Cost : Fill in the details of this column with the standard cost of the project that you are budgeting for. Ø Price1 : Fill in the details of this column with the selling price of the project costs that you have. Ø Price2 to Price5 : You can fill in this field if the selling price of your project costs consists of 5 different price levels (multi price). 2. Click the Save & Close button to save and close the New Project Cost Budget & Price Adj Last Cost form that you have created. MAKE A MATERIAL BUDGET AND PRICE ADJUSTMENT On the Material Budget & Price Adj form, you can determine the Budget Cost and the Selling Price (Price) of the Project Raw Materials that you have. You can determine the Budget Cost and Selling Price of Raw Materials for this Project by: 1. Open the New Material Budget & Price Adj form from the main menu Activities – Project – Material Budget & Price Adj. 2. Fill out the form according to the following instructions: a. Import : With this button you can fill in the details of the new material budget & price adj form by importing the file you have. Files that can be imported in this form are files of type: CSV, Excel, Dbase, Paradox, Interbase, LEVERAGE Import Log. b. Load From Default: This button is specifically provided for filling in the price column. You can use this button to fill in the price column according to the default price of the raw materials you have. c. Save to Default : After you fill in the price column details, you can click this button so that the raw material price value that you just adjusted is saved as the default price for that raw material. d. Adjustment No : Fill this field with the serial number of the form e. Adjustment Date : Fill in this field with the date on which you made adjustments to the budget cost and price of raw materials. f. Effective Date : Fill in this field with the date on which the Budget Cost and Price of the raw materials that you make will be effectively used in transactions. g. Description : Type a short description of the form you are creating. h. Adjust : With this field, you can easily specify which column details you want to adjust and specify the value of the adjustment you want. You can use this field if you have previously created a Material Budget&Price Adj. i. The table details for the Material Budget & Price Adj form consist of the following columns: v Item No : This column automatically displays the detail number  raw materials you have v Description : This column automatically displays a description of the raw materials you have. v Actual Cost : This column automatically displays the actual cost (HPP) of the raw materials you have. v Budget Cost : In this column, you can fill in the Budget Cost of the raw materials you have. v Price1 : In this column, you can fill in the price of the raw materials you have. v Price2 to Price5 : : You can fill in this field if the selling price is from. Your raw materials consist of 5 different price levels (multi price). 3. Click the Save & Close button to save and close the Material Budget & Price Adj form. MAKE WORK PRICE ANALYSIS Work Price Analysis is a formula analysis of the work done in completing a project. This Work Price Analysis displays a list of raw materials and labor costs and other costs needed to complete a job in project activities. Work Price Analysis can be made from the main menu Activities – Project – Work Price Analysis. 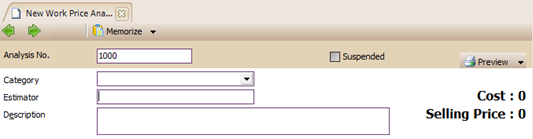
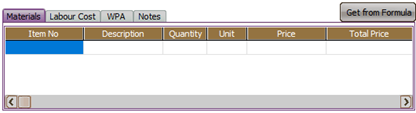
Material table details 
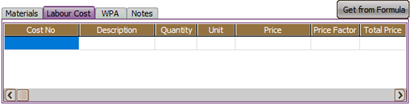
Detail Table Cost 
Fill in the Work Price Analysis form based on the following instructions: 1. Analysis No : Fill in this column with the serial number of the WPA form 2. Estimator : Fill in this column with the name of the user who made the Work Price Analysis 3. Description : Fill in this column with a brief description of the WPA form 4. Details Table of Materials a. Item No : This column automatically displays the raw material number you selected on the WPA form b. Item Description : This column automatically displays the raw material number you selected on the WPA form c. Quantity : Fill in this column with the quantity of raw materials needed to complete project work. d. Unit : This column will automatically display the unit of raw material that you use on the WPA form e. Total Cost : Automatically displays the total cost of the raw materials you use. f. Total Price : Automatically displays the total selling price of the raw materials you use g. Memo : In this column you can type a brief description regarding the raw materials you use. 5. Detail Table Cost a. Cost No : This column automatically displays the project cost number associated with project work. b. Description : This column automatically displays a description of the cost of the project you selected. c. Quantity : In this column, type the number of working hours or the quantity of the tools you use in project work d. Unit : This column automatically displays the units of labor and tools that you use e. Total Cost : This column will automatically display the total cost of the labor and tools you use. f. Total Price : This column will automatically display the total price of the labor and tools you use. g. Memo : In this column you can type a brief description of the workforce and the tools you use. PROJECT ACTIVITIES CREATE PROJECT FORMS The Project Form is a form that functions to record all information related to the Project Activity being worked on. Project forms can be created from the main menu Activities – Project – Project 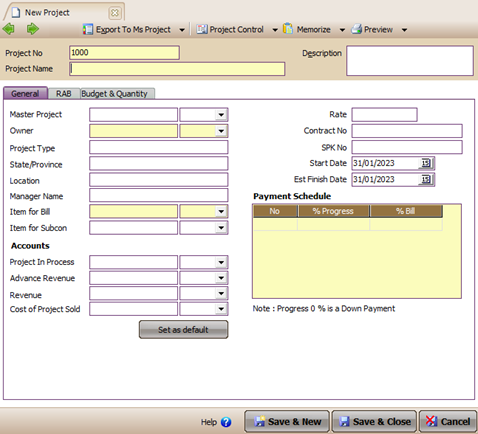
Form Header Description: 1. Column Project No : Fill in this column with the serial number of the form 2. Project Name column: Fill in this column with the name of the project you are working on 3. Column Description: Fill in this column with a brief description of the project you are working on. 4. Export to MS Project button: Button that you can use to export project information into the MS Project application. 5. Import from MS Project button: Button that you can use to import detailed project information from the MS Project application. 6. Project Control: Button which is a short cut to open List Quantity and Cost Control. 7. Material In Used: Button which is a short cut to open the New Material In Used form 8. Project Survey: Button which is a short cut to open the New Project Survey form. 9. Project Bill: Button which is a short cut to open the New Sales Invoice form to record project billing to customers. 10.Project Ending: Button which is a short cut to open the Project Ending form for recording the completion of project activities Recording project activity information on this form consists of 3 detailed information as follows: 1. General Information You can fill in detailed General information on the Project form by following these instructions: a. Master Project: If the project activity you are working on is part of another project, then in this column you can fill in the name of the project which is the master (parent) of the project you are working on. b. Owner : In this column, you can type the name of the owner of the project you are working on. c. Project Type : In this column, you can fill in the type of project you are working on. d. State/Province : In this column, fill in the name of the province that is the domicile of the project you are working on. e. Location : In this column, fill in the address for the location of the project you are working on. f. Manager Name : In this column, type the name of the manager who is responsible for the project. g. Item for Bill : In this column, select the item that will be displayed on the invoice when billing the project. You can make this item from the main menu List – Item – New, with the item type Non Inventory Part. Setting the GL Account of the item to the right account. h. Account : Automatically displays the Default Account for Project according to the settings you previously made in Setup – Preference – Profit And Cost Center. i. Rate: If your customer uses a foreign currency, then in this column you can fill in the exchange rate of the foreign currency against the base currency that you use. j. Contract No : Fill in this column with the Project Contract Number. k. SPK No : Fill in this column with the Work Order Number l. Start Date : Fill in this column with the date the project started m. Est. Finished Date: Fill in this column with the estimated completion date of the project. n. Payment Schedule: Create a project billing schedule to the project owner: • No : Serial number • % Progress: % completion of the project to be invoiced • % Bill : % that will be billed to the project owner 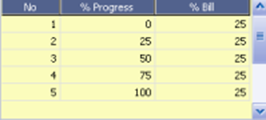
2. Project RAB [Plan Budget Plan] information 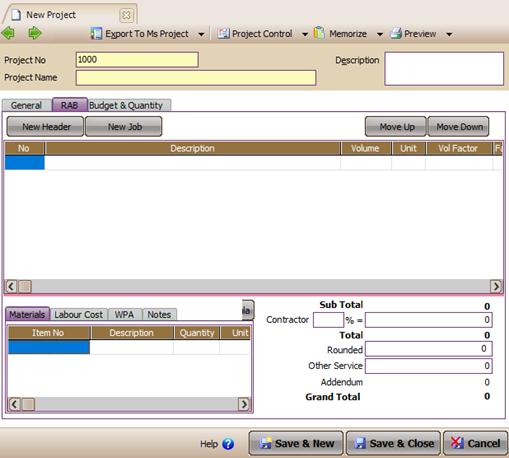 The detailed Project Budget Plan (RAB) table contains details of the work done in the completion of a project. In the Table of the Budget Plan for this Project, the components of raw materials and labor are displayed for each work detail, where the total RAB is the project value that will be invoiced to the project owner. You can make a Project Budget Plan (RAB) by following the instructions below: 1. Click the New Header button to record the Job Title 2. Click the New Job button to fill in the details of the work done to complete a project. Pay attention to the picture below:
· Click the New Header button to create a Job Title · Click the New Job button to detail the work you did to complete the project · Highlight the job details, then click the Get From Formula button, to fill in the Material and Project Cost details used in the work details according to the WPA you created earlier. You can also fill in the Material and Project Cost details manually if the WPA for the work is not available.
3. After all the details of your work are recorded in the Project Cost Budget Plan table, LEVERAGE will automatically calculate the total of the Project Cost Budget. Pay attention to the picture below: 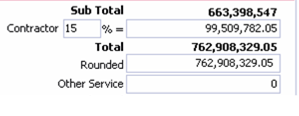
Total value profession Fill in the amount of Fee Contractor Fill in if there are extras other service fees 3. Budget & Quantity Information 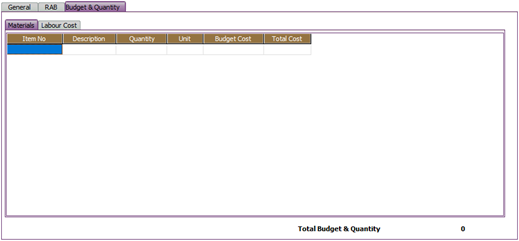
The Budget & Quantity table is a table that displays a list of raw materials, labor and tools used in project work. This table also displays information on the Budget or Project Budget which consists of the Raw Material Cost Budget and the Labor Cost Budget used in project work. After you have recorded all the project information in the Project form, click the Save & Close button to save the information that you have recorded and at the same time close the Project form that you have created. MATERIAL IN USED The Material In Used Form is a form that functions to record the use of raw materials and labor in Project Activities. This form can be created by: Clicking on the main menu Activities – Project – Material In Used. Fill out the Material In Used form by following the instructions below: 1. Project: Select the name of the project related to the recording of raw material, labor and overhead expenses. 2. Used No : Fill in this field with the serial number of the Material In Used form 3. Used Date: Fill in this field with the date of use of raw materials, labor and overhead 4. Description : Fill in this field with a brief description of the Material In Used form that you created. 5. Material table details: a. Item No : Select the item number used. b. Item Description : This field will automatically display a description of the item you selected. c. Qty : Fill in the amount of raw materials that you use in the Project Activity d. Unit : This field will display the units of raw materials used e. Warehouse: Select the name of the Warehouse where the raw material is stored. f. Notes: If necessary, provide notes regarding the raw materials you use. 6. Detail Tabel Labour & Overhead a. Cost No : Select the project cost number that you are using. b. Description : This field will automatically display a description of the project cost you selected. c. Qty : In this field, fill in the number of labor hours or overhead quantity that you use. d. Cost : This field automatically displays the cost/unit of labor/overhead quantity you are using. e. Notes : In this field you can type short notes f. Total Cost : This field automatically displays the cost/unit multiplied by the number of hours worked or the quantity of overhead you used. Example of filling out the Material In Used form 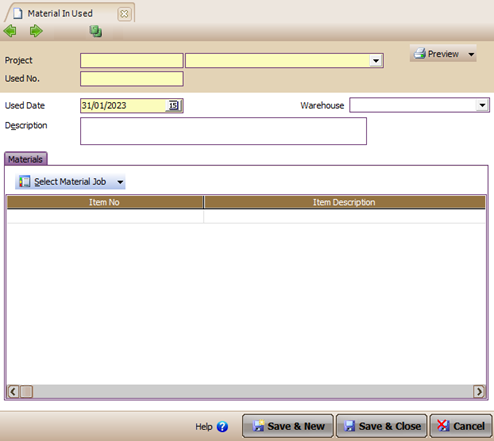
You can see the effect of Material In Used activities on the Company's financial position from the main menu List – General Ledger – Account History. PROJECT SURVEY The Project Survey Form is a form for recording the progress of project completion. Project survey activities are usually carried out before billing to the owner, so that the owner can adjust the payment schedule with the actual progress. Project survey activities will not affect the company's financial position, but with this project survey activity you can easily report the progress of completing project activities to the project owner. How to make a Project Survey Form 1. Click the Activities main menu – Project – Project Survey 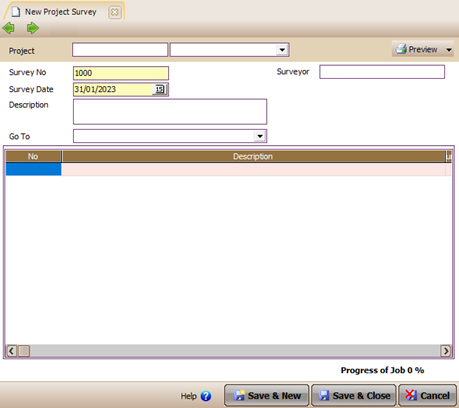
309 2. Fill in the project survey form based on the following instructions: a. Project : Select the name of the project to be surveyed b. Survey No: Fill in the serial number of the project survey form c. Survey Date: Fill in the date of the project survey d. Surveyor : Fill in the name of the person in charge of the project survey e. Details of the Project Survey Form table displays the details of the work in the project according to the details on the Project Budget Plan (RAB) form. You can fill in the quantity of completed project work details in the Progress column. Details Total Progress (%) will automatically display the % completion of the project. f. To report the project survey that you have done to the project owner, you can print the project survey report by clicking the Preview button. PROJECT BILL Billing activities for project completion to project owners are carried out in accordance with a pre-agreed payment schedule. You can bill the project to the project owner by following these instructions: 1. Click the Activities main menu – Project – Project Bill a. Project Down Payment Billing 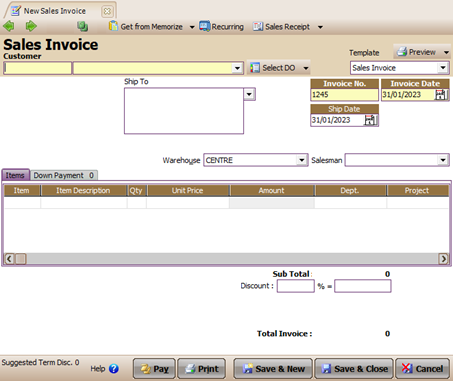
Select the Project Owner name Select Project Name Choose Term 1 = DP Project DP Billing Activities will automatically affect the company's financial position with a journal entry: b. Billing of Project Work in accordance with the agreed percentage of completion. Billing activities for the completion of 25% of project progress will automatically affect the company's financial position with a journal entry: Choose a project name to be billed Select term with progress that you want to charge. Total COGS is obtained from:(% project progress) x total RAB (before contractor fees and other services), COGS for the next progress billing is calculated by: (% current total progress - % previous invoiced progress) x total RAB. Billing activities for the completion of 25% of project progress will automatically affect the company's financial position with a journal entry: c. Project Work Billing with 100% project progress 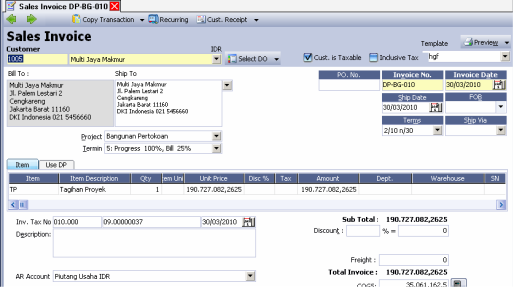
The total COGS for the last billing project (100% complete progress) is obtained by calculating: Total Actual COGS Project – 75% Billed Progress. Billing activities for the completion of 25% of project progress will automatically affect the company's financial position with a journal entry. PROJECT ENDING After the project completion progress is 100% complete and all billing for the project has been paid by the project owner, you can create a Project Ending Form to inform that the project you are working on has been completed. By creating a project completion activity, the Project Form associated with the completed Project Activity cannot be edited or inputted. You can record the Project Ending Form by following these instructions: 1. Open the new Project Ending Form from the Activities – Project – Project Ending main menu. 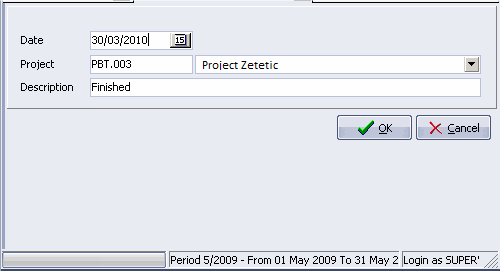
2. Fill out the Project Completion form according to the instructions below: a. Date : Fill in the date when the project was completed. b. Project : Select the name of the project that has been completed. c. Description : Type a brief description of the project completion form that you have created. PROJECT LIST MENU The Project List is a table that displays a list of project activities that you have worked on or are currently working on. You can open the Project Form [Project List] from the List – Project – Project main menu. The menu buttons found on the Project Register: 1. New: Menu button that functions to open a new Project Form. 2. Edit : Menu button that functions to change the details of the Project Form that you have created in the LEVERAGE Database. 3. Delete : Menu button that functions to delete the project form that you have created in the LEVERAGE Database. 4. Refresh: Menu button that functions to update the display 5. Print: Menu button that functions to see the Project List view before printing. 6. Bills: Menu button that functions to display a list of billing related to the project activity that you highlight. 7. In Used: Menu button that functions to display a list of raw materials taken related to the project activity you are highlighting. 8. Filter: Menu button that functions to display the Filter form on the Project List. 
Column details in the Project List consist of: 1. Project No : This column displays the serial number details of the Project form 2. Project Name: This column displays the details of the name of the project you are working on. 3. Description: This column displays a description of the project you are working on. 4. Manager Name: This column displays information on the name of the person in charge of the Project. 5. Person No : This column automatically displays the customer number who is the owner of the project you are working on (according to the number on the customer list). 6. Name : This column automatically displays the name of the customer who is the owner of the project you are working on. 7. Currency : This column automatically displays the currency information of the project owner. 8. Finished : This column automatically displays information on the status of project completion (Completed or Not). LIST OF RAW MATERIALS USED List of Raw Materials Used (List Of Material(s) In Used) is a table that displays a list of the Used Raw Material forms that you have created in the LEVERAGE Database. The Material In Used Form shown in this List is the Material In Used Form of an Active Project Activity (Not Yet Ending). The Material In Used Form can be opened from the main menu List – Project – Material(s) In Used. 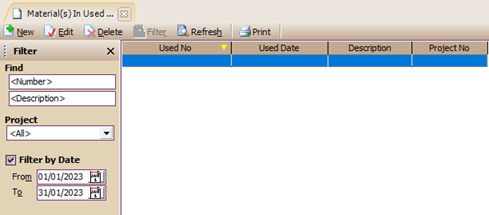
The menu button contained in the Table of List of Materials Used (Material In Used) consists of: 1. New: Menu button that functions to open a new Material In Used form view. 2. Edit : Menu button that functions to change the details of the Material In Used form that you have created in the LEVERAGE Database. 3. Delete: Menu button that functions to delete the Material In Used form that you have created in the LEVERAGE Database. 4. Refresh: Menu button that functions to update the appearance of the List of Materials In Used Form according to the last input of the form you did. 5. Print: Menu button that functions to view the list of used raw materials (Material In Used) before printing. 6. Filter: Menu button that functions to display the Filter form in the Material In Used Table. Thanks to these filters, you can easily find the form you want to open, modify or delete. Filtering the List of Used Raw Materials can be done by: a. Find : type the form sequence number or description of the form you are looking for in the Find field. b. Project : filter by project master c. Filter by Date : filter by project date Detailed columns contained in the Table of List of Materials Used (Material In Used) consist of: 1. Used No : This column displays details of the serial number of the used Raw Material form that you have created in the LEVERAGE Database. 2. Used Date : This column displays the date of use of raw materials, labor and project overhead. 3. Description : This column displays the detailed description that you type on the Raw Materials Used form. 4. Project No : This column displays detailed project numbers related to the use of raw materials, labor, and overhead. PROJECT SURVEY LIST Project survey list (List Of Project Survey) is a table that lists the project surveys you have done . This list can be opened from the main menu List – Project – Project Survey 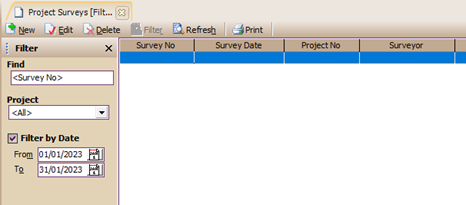
The menu buttons contained in the Project Survey List consist of: 1. New: This menu button functions to open a new Project Survey form. 2. Edit : This menu button functions to change the details of the Project Survey form that you have created in the LEVERAGE Database. 3. Delete : This menu button functions to delete the Project Survey form that you have created in the LEVERAGE Database. 4. Refresh: This menu button functions to update the display of the Project Survey list according to the last input of project survey activities that you did. 5. Print: This menu button functions to view the printed appearance of the Project Survey List before printing 6. Filter: This menu button functions to display the Filter form in the Project Survey List Table. With this filter you can easily find the Project Survey form that you want to open, edit, or delete. Filter the Project Survey list can be done by: a. Find : Type the number of the form you want to open, edit, or delete in the Find field. If the number you typed is in the Project Survey List, LEVERAGE will automatically highlight the form. b. Project : Filter the Project Survey list by project name. With this filter, LEVERAGE will only display Project Surveys related to the project name you have selected. c. Filter By Date: Filter the Project Survey list based on the survey date. With this filter, LEVERAGE will only display the Project Survey form with the date that you filter. Column details in the Project Survey List consist of: 1. Survey No : This column displays information on the serial number of the Project Survey form. 2. Survey Date: This column displays information on the date of the survey that you have conducted. 3. Project No : This column displays the name of the project you are surveying 4. Surveyor: This column displays information on the name of the person in charge of the project survey 5. Description : This column displays a description of the project survey form that you have created. QUANTITY LIST & COST CONTROL List of Quantity & Cost Control (List Of Quantity & Cost Control) is a table that displays information on Qty Budget, Qty Req., Qty Ordered, Qty Receipt, Qty Invoiced, Total Qty, and Qty In Used from raw materials, labor and overhead used in Project Activities. With this list, you can control the quantity of raw materials, labor, and overhead that you use to complete Project Activities. The List of Quantity & Cost Control can be opened from the main menu List – Project – Quantity & Cost Control. 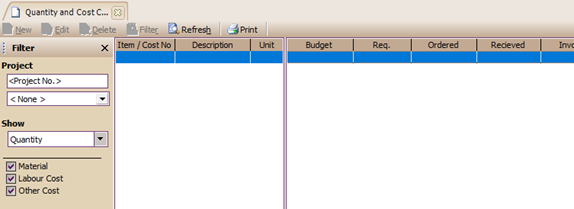
The menu button on the Quantity and Cost Control List consists of: 1. Filter Button: This button functions to display the Filter form on the Quantity and Cost Control List. You can filter the Quantity and Cost Control list by: a. Filter Project : Displays a list of quantity and cost control according to the name of the project you choose. b. Show : ü Quantity : Only displays Quantity column details on the Quantity and Cost Control List. ü Cost : Only displays the details of the Cost column in the Quantity and Cost Control List. 2. Refresh Button: Menu button that functions to update the appearance of the Quantity and Cost Control List according to the input of the project activities that you are doing. 3. Print button: Menu button that functions to see the display of the Quantity and Cost Control List before printing. Column details in the Quantity and Cost Control List consist of: 1. Item/Cost No: Displays information on the number of materials, labor, and overhead that you use in Project Activities. This information is taken from the Budget Plan. 2. Description : Displays descriptive information from the number of materials, labor, overhead that you use in Project Activities. 3. Unit : Displays information on units of material, labor and overhead that you use in Project Activities. 4. Qty Budget: Displays budget information for the quantity of material, labor and overhead that you use in Project Activities. 5. Cost Budget: Displays information on the budget costs per unit of material, labor and overhead that you use in Project Activities. 6. Total Budget: Displays total budget information 7. Qty Req: Displays information on the quantity of material, labor, and overhead requested for the project. 8. Qty Ordered: Displays information on the quantity of material that has been ordered to the Supplier. 9. Cost Ordered : Displays information on the cost/unit of material ordered to Suppliers. 10. Total Ordered: Displays information on the total order cost of materials ordered to Suppliers. 11. Qty Receipt : Displays information on the quantity of material that you have received from the Supplier but have not been billed by the Supplier. Receipt of this item is recorded on the Receive Item Form. 12. Qty Invoiced : Displays information on the quantity of material that you have received where the receipt of this item is recorded on the Purchase Invoice Form. 13. Cost Invoiced: Displays information on the cost/unit material in accordance with the Purchase Invoice form. 14. Total Invoiced: Displays information on the total cost of materials according to the Purchase Invoice Form. 15. Quantity : Displays the total quantity of material, labor, overhead that you can use in carrying out Project Activities. 16. Total : Displays the total cost of materials, labor, and project overhead. 17. Qty In Used : Displays the actual quantity of material, labor and overhead that has been used in carrying out Project Activities. PROJECT COMPLETION LIST [LIST OF PROJECT ENDING] The List of Project Ending is a table that displays the List of Project Ending Forms that you have created. List of Project Completion (List Of Project Ending) can be opened from the main menu List – Project – Project Ending. The menu button on the List of Project Ending consists of: 1. New: This menu button functions to open a new project ending form display. 2. Edit: This menu button functions to change the details of the project ending form that you have created. 3. Delete: This menu button functions to delete the project completion form that you have created. 4. Refresh: This menu button functions to update the list of project completion forms according to the last input you made. 5. Print: This menu button functions to see a list of completed projects before printing 6. Filter: This menu button functions to display a filter form on the project completion list. You can filter this list by the completion date of projects you have created. 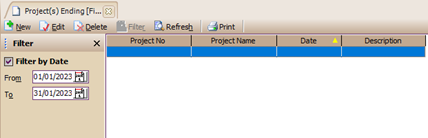
The column details contained in the List of Project Endings consist of: 1. Project No : Column that displays information on the number of projects that have been completed. 2. Date : Column that displays project completion date information. 3. Description: Column that displays a description of the completion of the project. |