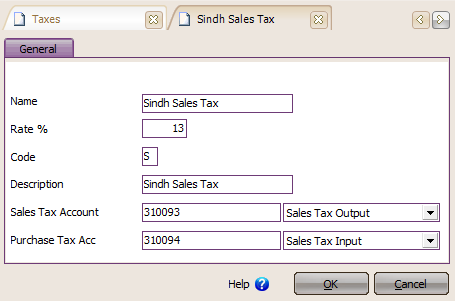
1. List of Tax Codes (Taxes) List of Tax Codes (Taxes) is a table that displays Tax Codes. The Tax Code functions to calculate Tax automatically and will be recorded in the selected Default Account. Tax codes that can be displayed in this list are: a. VAT Tax Code: If buying and selling activities in your company are subject to VAT, then you can create a code for the VAT so that when you record a purchase or sale transaction, you can input this code on the Purchase or Sales Form so that LEVERAGE can calculate and display the value VAT on the Purchase and Sales Forms automatically. HOW TO MAKE A LIST OF TAX CODE You can list the tax codes that you will use in your transactions by following the instructions below: a. Click the main menu List – Others-Taxes-New 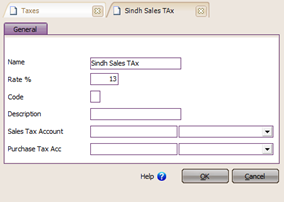
b. Fill out the New Tax form by following the instructions below: ü Name : Fill in the name of the Tax. For example: VAT ü Rate % : Fill in the percentage of the tax rate. ü Code : Type in the tax code you want. this code later that you will use on Purchase and Sales forms. ü Description : Type a short description of the tax. ü Sales Tax Account: In this column select the default account that will be record the tax when you record the tax code in Sales Activity. ü Purchase Tax Acc: In this column select the default account that will record the tax when you record the tax code in Purchase activity. c. Click the OK button to save the Tax Code that you just entered. You can display the tax code on forms related to sales such as Sales Orders, Sales Invoices, Sales Returns, and those related to purchases such as Purchase Orders, Purchase Invoices and Purchase Returns. This Tax Code function will calculate Tax automatically and will be recorded in the selected GL Account. The Tax Code relates to 3 form lists namely Customer List, Vendor List and Item List. When making purchase and sale transactions related to tax you just need to enter the tax code you want on the purchase or sale form, then LEVERAGE will automatically calculate the tax value by multiplying the tax rate and recording it to the default account that you have specified. 2. List of Terms (List Of Terms) Is a list of conditions or terms of payment in cash or credit. LEVERAGE uses the X?Y n/Z and C.O.D (Cash On Delivery) term formats. X is the percent discount given to the payer if payment is made during the discount period, Y is the discount period, and Z is the due date period. For example 2/10 Net 30 means getting a 2% discount (will get discount) from the selling price, if paid within 10 days (if paid within) from the date of sale, repayment exceeds 10 days is not subject to a discount, receivables are due 30 days from the date of sale The following image shows an example of filling out the Terms Of Payment table: 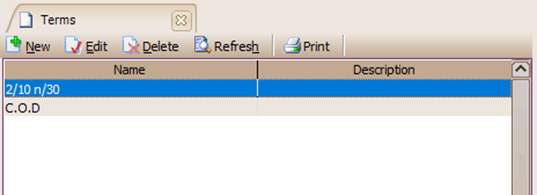
Information : · Discount % : Fill in this column with the term discount (in percent) · Discount Days : Fill in this column with the term discount period · Net Due In : Fill in this column with the maturity period of the debt/receivable · Name : After you fill in the Net Due In column, please press Enter on the keyboard twice, LEVERAGE will automatically fill in this column with the term name according to the input you did. You can add, edit and delete Terms Of Payment data directly on the Terms Of Payment Table or you can do it using the buttons available above the table. Here's the explanation: • Add button: This button functions to add term data to the Terms Of Payment table. • Edit button: This button functions to change (edit) the term data contained in the Terms Of Payment table. • Delete button: This button functions to delete term data contained in the Terms Of Payment table. 3. List of Shipping Services (List Of Shipment) List of Delivery Services (Shipments) is a table that displays a list of shipping services that you use in buying and selling goods. Goods delivery services will usually be displayed on Purchase Invoices and Sales Invoices. HOW TO CREATE A NEW SHIPMENTS LIST To create a new Shipment list, you can do it by: 1. Click the main menu List – Other Lists – Delivery Services (List – Other List – Shipments); 2. In the Shipments List table, click the New button. 3. On the New Shipments form, fill in the name of the Shipping Service you want. 4. Click the OK button to save the Shipping Service you just entered. HOW TO REMOVE THE LIST OF SHIPPING SERVICES You can delete the list of delivery services that you have created from the list of delivery services by: 1. Open the Delivery Service List table by clicking on the main menu List – Other List – Delivery Service (List – Other List – Delivery Service); 2. Highlight the Delivery Service that you want to delete, then click the DELETE menu button or right click the mouse and select DELETE. HOW TO CHANGE (EDIT) SUBSCRIBER TYPE LIST You can change (edit) the List of Delivery Services that you have created from the List of Delivery Services table by: 1. Open the Shipping Services List table by clicking on the main menu List – Other List – Shipping Services (List – Other List – Shipments); 2. Highlight the delivery service that you want to change, then click the EDIT menu button or right-click and select EDIT. 4. List of Customer Types The Customer Types list is a table that lists the types of customers you have. The list of customer types that you create will be required when creating a Customer List. Recording customers by type, allows you to view sales reports per customer type and sales analysis per customer type. HOW TO MAKE A LIST OF CUSTOMER TYPES (CUSTOMER TYPES) You can do this by: 1. Click the main menu List – Other List (List – Other List) 2. Then select Customer Type (Customer Type) 3. In the Customer Type list table, click the New button 4. On the New Customer Type form, fill in the type of customer you want. 5. Click the OK button to save the type of customer you just entered. HOW TO REMOVE CUSTOMER TYPE LIST You can delete the list of customer types that you have created from the Customer Type List table by: 1. Open the Customer Types List table by clicking on the main menu List – Other List – Customer Types (List – Other List – Customer Types); 2. Highlight the type of customer you want to delete, then click the DELETE menu button or right-click and select DELETE. HOW TO CHANGE (EDIT) SUBSCRIBER TYPE LIST You can change (edit) the list of customer types that you have created from the Customer Type List table by: 1. Open the Customer Types List table by clicking on the main menu List – Other List – Customer Types (List – Other List – Customer Types); 2. Highlight the type of customer you want to change, then click the EDIT menu button or right-click and select EDIT. 5. List of Commission Limits (Commission Range) This list is a reference in calculating the salesman's commission that will be paid to the salesman when the salesman makes a sales transaction. How to set Commission Limit: 1. Click the main menu List – Other List (List – Other List) 2. Select and click Commission Range. 3. Then click New, then fill in the Commission Limit information you want. Then click the OK button to save the commission limit that you have created. Consider the following example of filling out the commission range form: Caption : 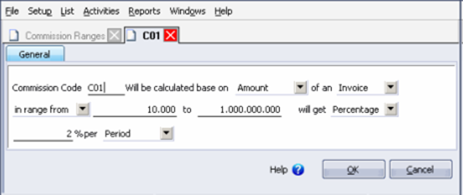
Information: a. Commission Code: Enter the commission code (can be up to 5 characters) b. Will be calculated base on : Will calculate commissions on the basis of calculations from Quantity (Item Goods), Amount (Total Invoice before tax), or Gross Profit (Gross Profit). c. Of an : Calculation of the commission from the number of items sold or the number of sales invoices (invoices). d. In range from : Within the limit of the number of…… e. To : Within the limit up to ……. f. Will get: Will get a commission of a percentage or fixed g. Per : If it's a percentage, fill in the commission x % but if it's still, fill in the amount of the commission given. Giving commission per an amount in one period or per invoice. 6. List of Sellers (Salesman) This list of salesmen (sellers) will later appear every time you make a Sales Order and Sales Invoice, provided that you have activated the √ Use Salesman feature from the main menu Setup – Preference – Feature. How to make a Salesman List (Seller): 1. Click the main menu List – Other. Select and click Salesman 3. Then click New, then fill in the Seller information you want. Click the OK button to save the new salesman form that you have created. You can fill out the New Salesman form based on the following instructions: a. First Name : Fill in this column with the first name of the seller b. Last : Fill in this column with the second name (surname/family name) c. Job Title : Fill in this column with the seller's position in the Company d. Business 1&2 : Fill in this column with telephone numbers for line 1 & 2 and their extensions. e. Cellular : Fill in this column with handphone/cellular/mobile phone number f. Fax : Fill in this column with the facsimile number g. Home : Fill in this column with home phone number h. Pager : Fill in this column with pager number i. E-mail : Fill in this column with the sales email address. j. Commission : ü Code: Enter/select the commission code that applies to the salesman. Can be more than one commission line. ü Description : Automatically appears a description of the selected code. |